DEDICATION

This blog is dedicated to the restoration of the Austin Healey 3000...among the most desirable of all British sports cars.

Sunday, August 19, 2012

INSTALLING THE NEW BATTERY

The old battery, shown in previous posts, was not correct for this car.  Tim purchased a period correct "tar top" battery complete with the tray, retaining clamp and cover.  We also found it necessary to replace the battery master switch.  The original switch was defective.
The new battery switch and tray are pictured in the photo to the right.  You will also notice the wood block fixed to the wall of the trunk.  This block helps to stabilize the battery.


The photo to the left shows the new battery held in position with the retaining clamp.  A vinyl cover will be fitted to the battery when the connections are made for the last time.


The archive listing of this blog contains detailed step-by-step photos and narratives regarding this restoration since it began late last December.  Please direct any comments and questions to tommystoplesscars@yahoo.com.


Stay tuned...
Tom McCurry

Saturday, August 18, 2012

READY TO ASSEMBLE THE FRONT BODY PARTS

After a week or so of bodywork, the front shroud and fenders are ready to rough fit.  We need to make sure that the fenders and shroud line up with the attachment brackets before final installation.  Also, we will take this opportunity to check the alignment between the front fenders and doors and to adjust the body lines on the side.  If additional bodywork is required, now is the time.
Today I installed the fan shroud which is shown in the photo to the right.  This shroud directs the air coming through the grille to the radiator.  It is fastened to the bottom of the grille.

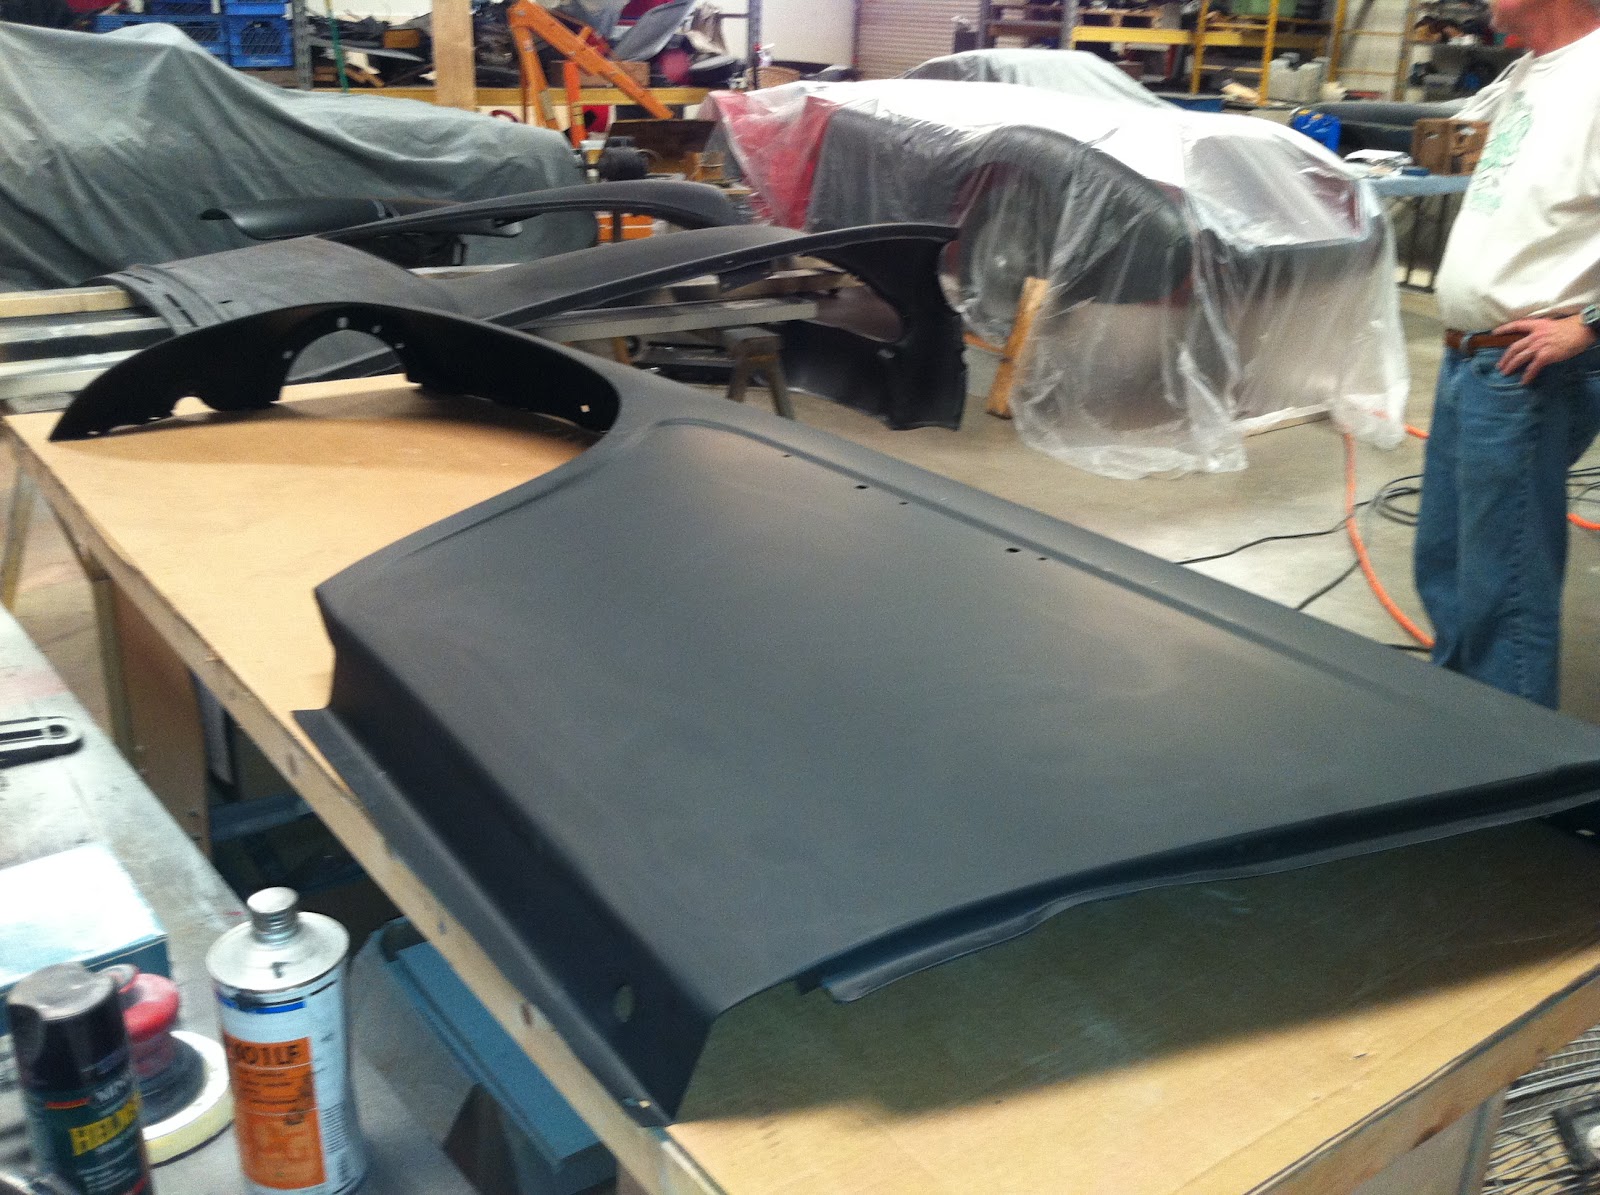
The final paint has been applied to the underside of the front shroud (or cowl).  Monday morning we will be assembling the front clip.  


The archive listing of this blog contains detailed step-by-step photos and narratives regarding this restoration since it began late last December.  Please direct any comments and questions to tommystoplesscars@yahoo.com.

It's taking shape...
Tom McCurry

Thursday, August 16, 2012

THE HEALEY HAS BEEN NAMED

I believe all cars should have a name other than the one the factory bestowed upon them.  The Austin Healey 3000 is certainly no exception.  And without a doubt it should bear a female name, after all it is beautiful and sexy.  
Tim, Don and I discussed this over lunch yesterday.  The Healey, being of English decent, requires a classy, sexy name that everyone recognizes.  We decided it would be appropriate to name it after one of James Bond's women.    But, we could not come up with one of Bond's girls that was even remotely as sexy as this car.  
Then this morning I received a text from Tim that read, "Think of 1961, a red dress and a white mink.  What name comes to mind?"  This concours 1961 Austin Healey 3000 DB7 will forever be known as "Marilyn".  Quite appropriate, wouldn't you say?

Now all Tim needs is a diamond key chain...
Tom McCurry

The archive listing of this blog contains detailed step-by-step photos and narratives regarding this restoration since it began late last December.  Please direct any comments and questions to tommystoplesscars@yahoo.com.

Wednesday, August 15, 2012

UPHOLSTERY WORK BEGINS

Tim was present for the start-up.  He came to Hilton Head on Tuesday morning and played an integral part in starting the engine for the first time.  This morning Tim, Don and I began work on the upholstery.  


Tim had chosen red leather seats with white piping; a great nostalgic look.  Tim and I began work on the bucket seats while Don fabricated the plywood backing for several of the interior panels.  The work was progressing nicely until we discovered that some of the seat upholstery panels were missing.  Tim gave the upholstery shop a call and they will be sending the pieces as soon as possible.  But the fabrication of the interior will continue.
Tim also ordered parts for the battery set-up located in the trunk.  They were ordered from both Moss Motors (mossmotors.com) and Victoria British (victoriabritish.com).  The battery shown in the photo to the left will be replaced with a new, period correct, battery, tray and clamp kit.  It will be as close to original as possible.


The body work is progressing nicely and we will be fitting the front fenders and cowl on Friday.

Stay tuned...
Tom McCurry


Tuesday, August 14, 2012

START-UP ACCOMPLISHED

All that talk about crossing "t"s and dotting "i"s payed off.  We began the start-up procedure early this morning and with the exception of one defective part, it went smoothly.  The defective part was a ball cock used as a coolant drain on the engine block.  After being installed for four days, it decided to leak today.  Fortunately, I had another new valve in stock and its replacement took less than an hour.  


After connecting the battery, turning the switch and pressing the starter button, it fired immediately.  This engine ran as smoothly as any I have witnessed; the benefit of balancing an engine.  Obviously the use of the quality parts, most of which were purchased from Moss Motors (mossmotors.com), and attention to detail makes the entire process less time consuming.


Now that the engine is running, we will install the front cowl and fenders.  John, our body man, has the panels ready to test fit.  After the necessary adjustments are made, the exterior painting will begin.

The archive listing of this blog contains detailed step-by-step photos and narratives regarding this restoration since it began late last December.  Please direct any comments and questions to tommystoplesscars@yahoo.com.


Love this Healey...
Tom McCurry

Monday, August 13, 2012

FINALLY...READY FOR START-UP

To be sure, we have done our "homework".  We have made sure that the fluid and wire connections were made properly.  But understand, it would be a miracle if this car started the first time I turn the key.  There is always a bad connection or a defective part.  But, with any luck, we will have the Healey running by tomorrow night.
Tim is coming to the shop tomorrow to help with the start-up.  We are all excited and anxious, to say the least.
Today we pressurized the accumulator, connected the battery and installed the new stainless steel exhaust system all in preparation of tomorrow morning.  Take a look at the new polished stainless exhaust system in the photograph below.  It will be removed following the start-up procedure to make the paint and bodywork easier.  


The photo to the right shows the battery and cable installation in the trunk.  The Healey is factory equipped with a battery disconnect switch which is a good idea, especially in an older car (a great anti-theft device too).  If you look closely, you can see it just below the battery.


Check back tomorrow...
Tom McCurry

Sunday, August 12, 2012

THE BODY WORK PROGRESSES

John, our body man, has been putting the finishing touches on the front fenders and trunk lid this past week.


Now both sides of these panels are ready to "block" and paint RED.  At this point, only the rear shroud requires body work.


Next we will be mounting the front fenders and cowl on the car to assure a proper fit.


The archive listing of this blog contains detailed step-by-step photos and narratives regarding this restoration since it began late last December.  Please direct any comments and questions to tommystoplesscars@yahoo.com.


Stay tuned...
Tom McCurry

Saturday, August 11, 2012

ACCUMULATOR CONNECTION COMPLETED

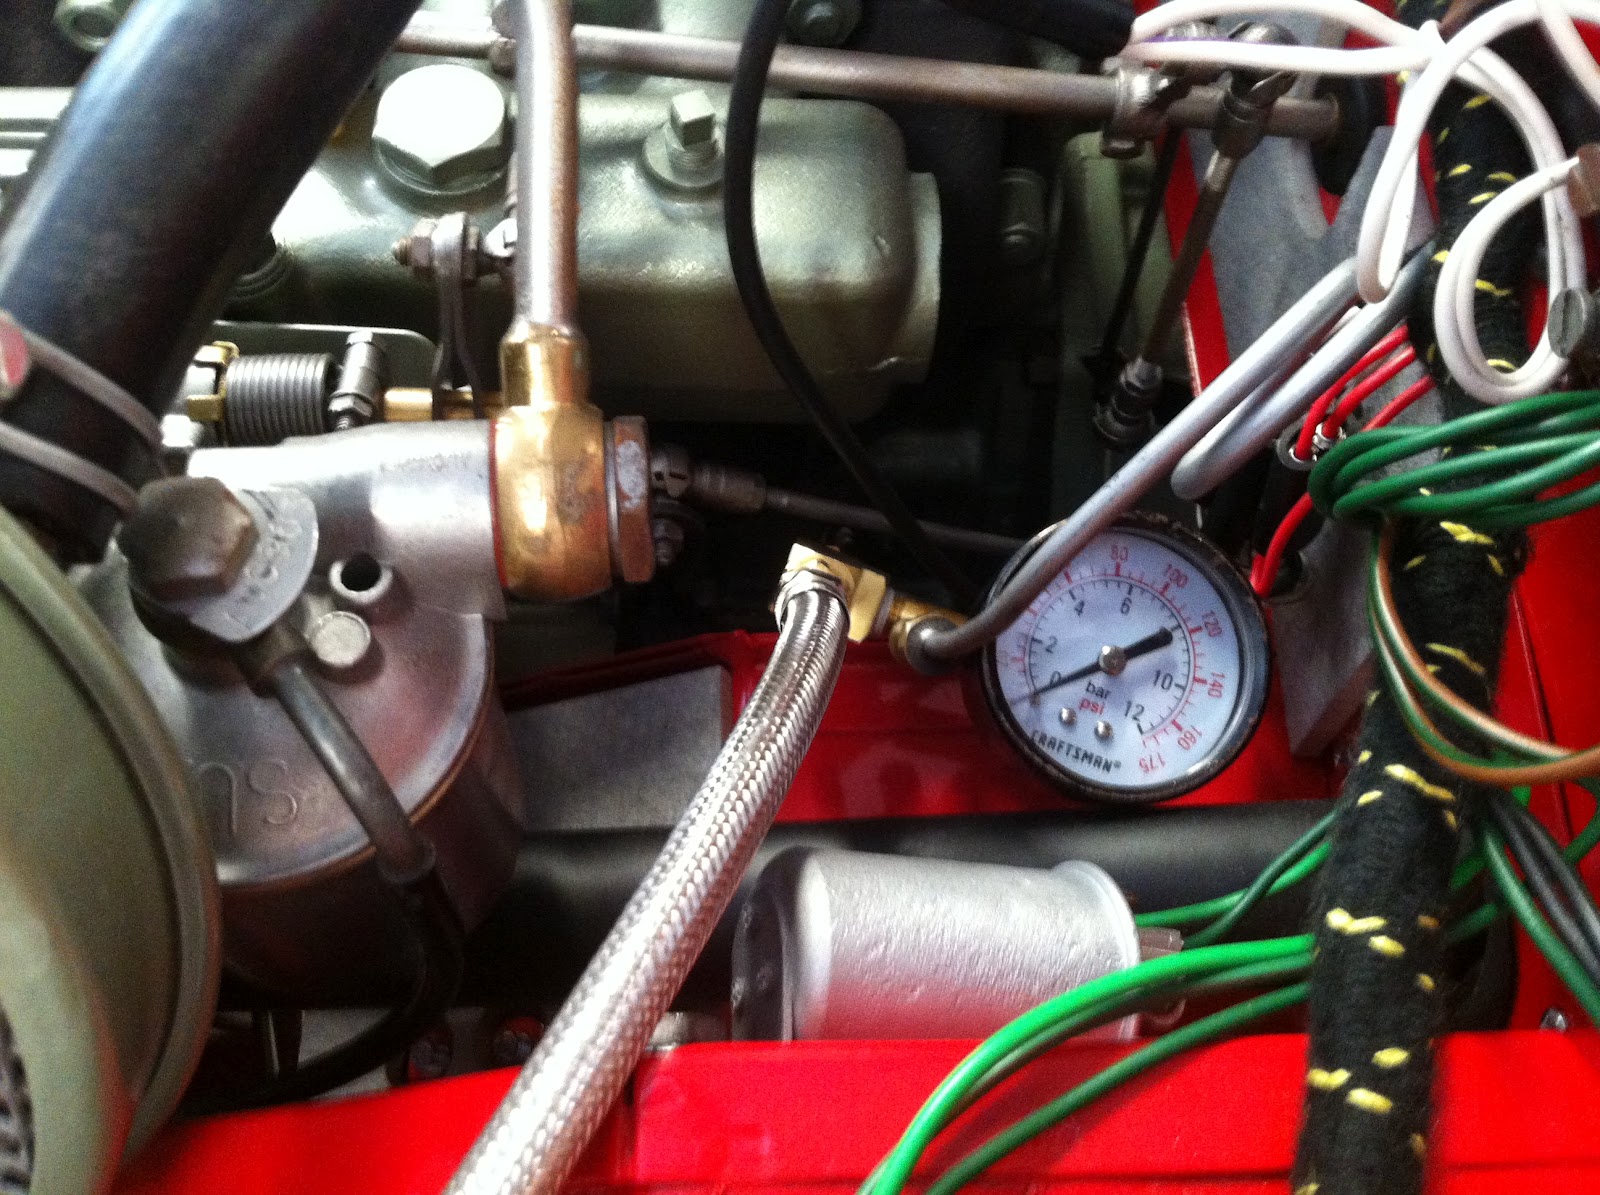
In preparation of start-up, we completed the connection of the accumulator, or priming tank.  We experienced a bit of difficulty connecting the oil lines because we were trying to activate the original oil pressure gauge.  We gave up.  A short length of 3/16 OD copper tubing was required to complete the connection and it was not available.  So, we simply installed another pressure gauge; abandoning the original one.  It will work nicely.  Now we can monitor the oil pressure and water temperature during the start-up process.  The pressure gauge set-up is shown in the photo below.

The Smiths water temperature gauge is connected and mounted near its original position in the car.  It is shown in the photo below.  Notice there are two dials on this gauge.  One is water temperature and the other is oil pressure which was abandoned for the purpose of start-up.


The archive listing of this blog contains detailed step-by-step photos and narratives regarding this restoration since it began late last December.  Please direct any comments and questions to tommystoplesscars@yahoo.com.

Start-up on Monday...
Tom McCurry

Friday, August 10, 2012

FUEL DELIVERY SYSTEM COMPLETE

The efforts to complete the installation of the Healey's systems necessary for start-up continued today.  We accomplished a great deal.  
Shown in the photo below, the wiring harness serving the rear of the car was fitted in place and the fuel pump was connected.

The fuel tank, after being cleaned and sealed inside,  was fitted to the trunk space and fastened down with the original straps.  The fuel line and wiring to the fuel gauge sending unit were also connected.


The wiring harness that feeds the sending unit also serves the tail lights.  They too were routed into place.
We will be adding the fluids to the engine and transmission tomorrow and then we are ready to start the engine Monday morning.

The archive listing of this blog contains detailed step-by-step photos and narratives regarding this restoration since it began late last December.  Please direct any comments and questions to tommystoplesscars@yahoo.com.

Stay tuned,
Tom McCurry


Thursday, August 9, 2012

BODY WORK AND START-UP PREP CONTINUES

John, my body man, has almost completed the body work and is ready to start "blocking".  He will be painting the inside of the fenders tomorrow and Monday...Saturday too, if I can talk him into it.  At that point we will test fit all the body panels to make sure all the fastener holes are properly aligned.  I feel reasonably sure they will fit, but I do not want any surprises.
Today, I reconnected the fuel gauge sending unit to the tank and prepped it for installation.  I also ran the main wiring harness to the rear end of the car and connected the fuel pump.  Tomorrow I plan to install the vinyl trim kit in the trunk space.  At that point, we will be connecting the fuel tank to the lines completing the installation of the fuel delivery system.  The battery cables and battery, also located in the trunk, are ready to be connected.  
After the trunk space connections are completed, with the exception of adding the fluids to the lubricating system and cooling system, the engine is ready to start.  Pretty exciting stuff...

The archive listing of this blog contains detailed step-by-step photos and narratives regarding this restoration since it began late last December.  Please direct any comments and questions to tommystoplesscars@yahoo.com.

Pictures to follow...
Tom McCurry

Wednesday, August 8, 2012

START-UP PREPARATIONS CONTINUE

Today, Don and I raised the car above floor level...again.  This time it was in preparation of start-up.  The ground wire from the engine to the frame and the hydraulic line from the master cylinder to the slave cylinder were connected.  These operations could not be completed until now because the engine was not in place.


We also attached the oil lines connecting the accumulator to the engine block.  The photo above shows the flexible line connecting the engine block to the accumulator.  The water temperature  and oil pressure gauge is also connected to supply us with all the necessary information we require during start-up. 

 The polished stainless steel header pipes, connecting the exhaust header to the muffler, were fastened in place...absolutely beautiful.
The photo to the right shows the header to header pipe connection.  The muffler cannot be installed until the body work adjacent to the trunk has been completed.  So, the start-up will be accomplished without the benefit of a muffler...music to my ears.
The archive listing of this blog contains detailed step-by-step photos and narratives regarding this restoration since it began late last December.  Please direct any comments and questions to tommystoplesscars@yahoo.com.


Stay tuned...
Tom McCurry


Tuesday, August 7, 2012

START-UP PREPARATIONS

With the fuel tank sealer applied, the fuel delivery system is nearing completion.  I spent the morning preparing the accumulator, or priming tank, for installation.  The pre-oiling process is pretty simple.  After the accumulator cylinder is charged with two quarts of oil and pressurized, it is connected to the engines lubricating system via the oil pressure gauge port on the side of the block.  The remainder of the oil capacity, five quarts, is poured into the oil sump.  When the accumulator is activated, oil is forced by air pressure throughout the lubricating system.  At that point the engine can be started.  This is the best and safest way to start a fresh engine.  The accumulator was manufactured by Moroso and purchased from Summit Racing (summitracing.com).  Check them out.  They stock quality automotive products and equipment.
The archive listing of this blog contains detailed step-by-step photos and narratives regarding this restoration since it began late last December.  Please direct comments and questions to tommystoplesscars@yahoo.com.
Hopefully, by the weekend, we will be prepared for start-up.  

More tomorrow...
Tom McCurry

Monday, August 6, 2012

SEALING THE FUEL TANK

I took the weekend off to be with my daughter and her boyfriend.  We had a great time but now it's back to work.
As the body work progresses, Don and I are concentrating on preparing the engine for start-up.  We set-up the accumulator, or priming tank this morning.  The accumulator is used to pre-oil the engine before it is started for the first time.  This greatly reduces the wear on the engine during initial start-up.  The engine rebuild was expensive and we must go to great lengths to protect it.
The fuel tank was also addressed today.  It was in excellent condition to be 51 years old, but there was a small amount of rust and varnish on the inside.  We purchased a fuel tank sealer kit from the Eastwood Company (eastwood.com). They specialize in automotive restoration materials and equipment. 
The sealer was relatively easy to apply.  After the tank was cleaned inside with soapy water and etched with acid, the sealer is poured into the tank. Then the sealer is "sloshed" around until every surface inside the tank is coated.  After allowing 48 hours to cure properly, the coating becomes impervious to gasoline and alcohol.
Now the fuel system will be free from impurities.  As I said, this engine rebuild was expensive; no need to ruin it with trash in the fuel lines.  
The tank will be installed and connected to the fuel lines on Wednesday.  At that point, we will be ready to fuel the system and check out the fuel pump.

One step closer...
Tom McCurry

Thursday, August 2, 2012

PREPARING FOR UPHOLSTERY

Now that we have the metal seat frames stripped and refinished,  our time is devoted to restoring the mounting hardware and seat position adjusters.  The position adjusters are mounted to the floor pan atop wooden slats.  They could not be reused.  I fabricated new ones from maple and coated them with urethane varnish.  


Tim had chosen the interior colors to blend with the exterior paint.  The leather seat covers and vinyl panels match very well.  The carpet, depending on your viewpoint, varies from light to dark.  It is well within the range of acceptability.  This photo does not capture the true nature of the colors, but it is close.  


The bodywork is continuing and hopefully it will be RED very soon.  Now that the installation of the engine systems are almost completed, we are planning to begin the start-up procedure early next week.
The archive listing of this blog contains detailed step-by-step photos and narratives regarding this restoration since it began late last December.  Please direct comments and questions to tommystoplesscars@yahoo.com.

I love this car...
Tom McCurry