DEDICATION

This blog is dedicated to the restoration of the Austin Healey 3000...among the most desirable of all British sports cars.

Sunday, September 23, 2012

TRUNK INTERIOR COMPLETED


The spare tire retaining system was installed yesterday.  This completed the interior of the trunk space.  The genuine leather belt, pictured in the photo to the left, holds the spare firmly in place...a nice vintage touch.


The archive listing of this blog contains detailed step-by-step photos and narratives regarding this restoration since it began late last December.  Please direct any comments and questions to tommystoplesscars@yahoo.com.


Stay tuned...
Tom McCurry ,

Materials and equipment purchased from:
Moss Motors (mossmotors.com)
Victoria British (victoriabritish.com)
Eastwood (eastwood.com)
The Roadster Factory (the-roadster-factory.com)
English Parts (englishparts.com)
Napa Auto Parts (napaonline.com)


Saturday, September 22, 2012

TRUNK SPACE COMPLETED

Today was a great day.  The Healey is really taking shape.  Don and I completed the trunk upholstery and prepared the space for the new spare wheel.  Tim has purchased a new set of chrome wire wheels. We also have one for the trunk.  This will look great.  There is a leather belt and retaining rod that is used to confine the spare.  Photos will follow next post.

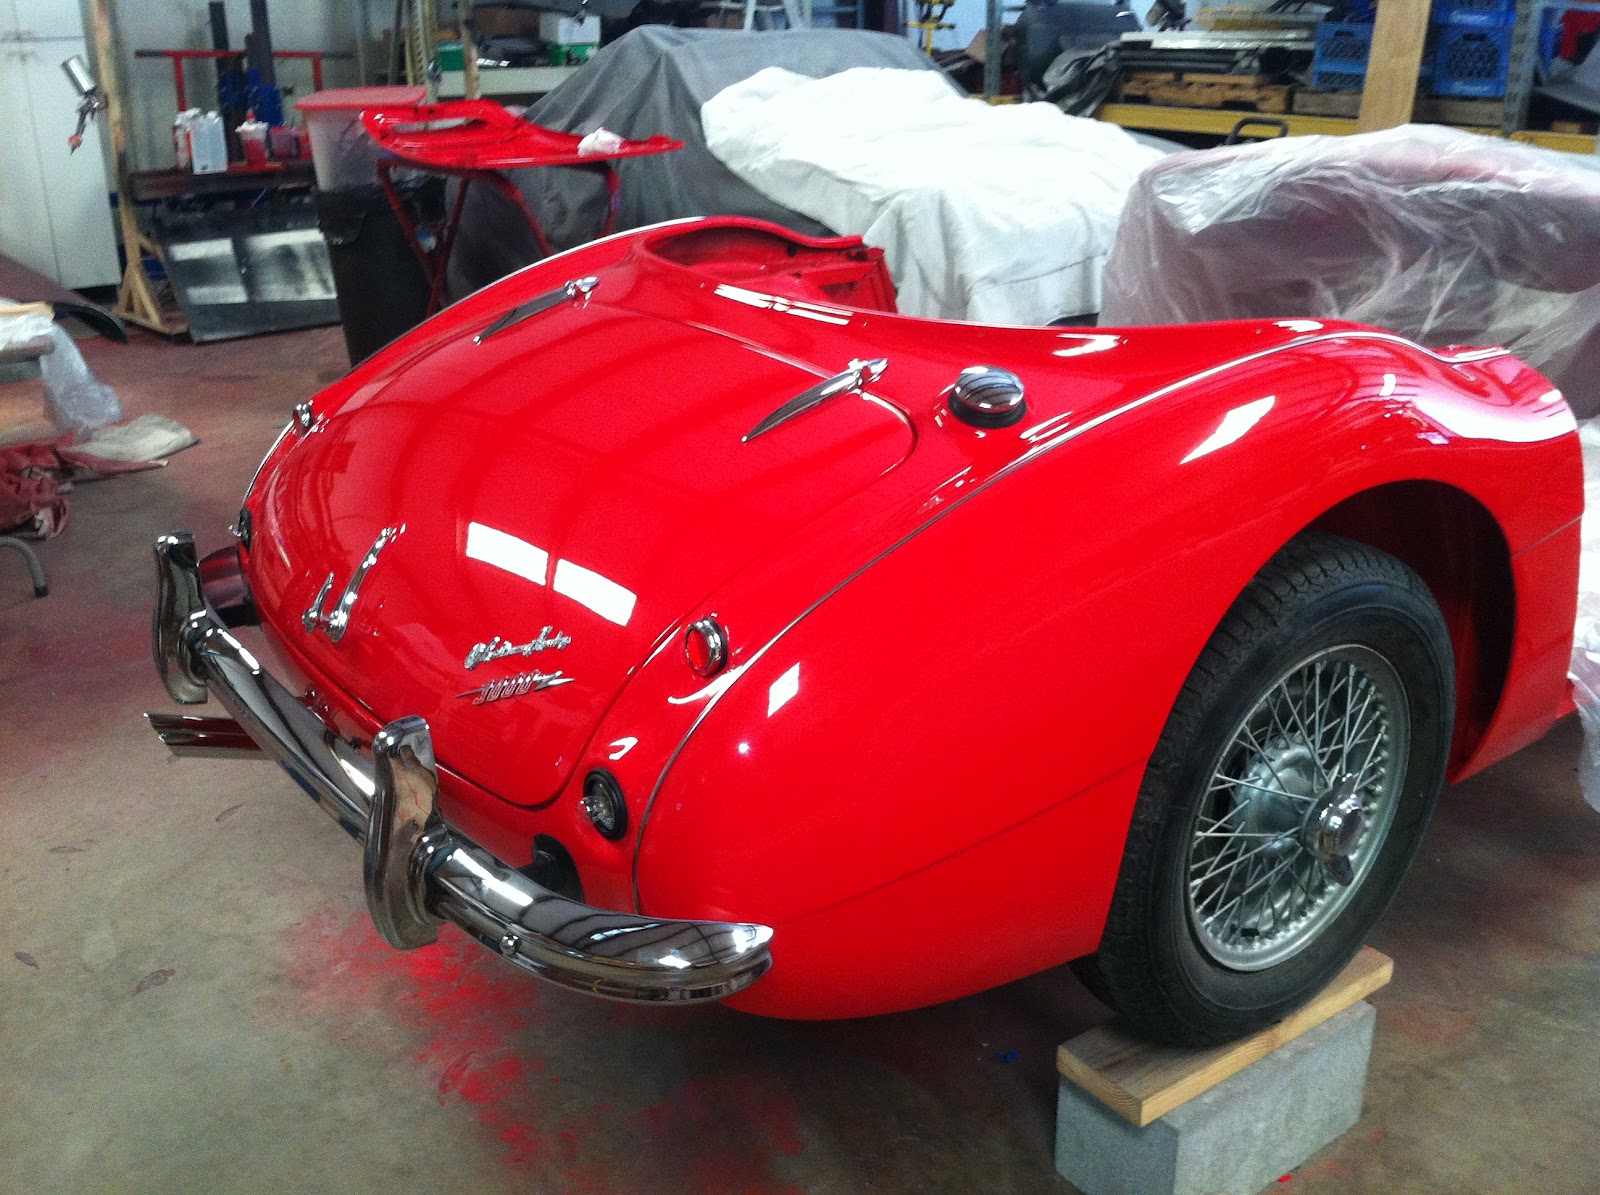
Next, we installed the trunk lid hinges, lock and badges and fitted it to the car...perfect fit...perfect alignment.  I cannot wait for Tim to see it up close on Monday.


Funny thing about paint jobs and cameras.  Automotive paint  always looks better in photos.  This one, however, looks better than "factory" and these photos by no means enhance it.  Our painter is an artist with a spray gun.


We will also have the front shroud ready for installation on Monday...just a bit more polishing.  We have already test fitted the grille so there will be no surprises there.


The archive listing of this blog contains detailed step-by-step photos and narratives regarding this restoration since it began late last December.  Please direct any comments and questions to tommystoplesscars@yahoo.com.


Big Healeys are beautiful...
Tom McCurry ,

Materials and equipment purchased from:
Moss Motors (mossmotors.com)
Victoria British (victoriabritish.com)
Eastwood (eastwood.com)
The Roadster Factory (the-roadster-factory.com)
English Parts (englishparts.com)
Napa Auto Parts (napaonline.com)


Friday, September 21, 2012

UPHOLSTERING THE TRUNK SPACE

While John was busy with the paint work today, I began the installation of the trunk space upholstery kit.  Tim had purchased it some time ago.  The panels, purchased from Moss Motors, fit very well.  I was successful in fitting all of the panels except for the largest one.  For that, I need another pair of hands...Don will be back tomorrow morning. 
It is almost sad to cover the fresh red paint in the trunk space, but this material is almost an exact copy of the original and it looks great.


I also had the opportunity to install the new battery.  Great fit...great look.


The trunk lid is now ready to install and that is next on the list.  We will be fitting the chrome hinges, latch and of course the correct Austin Healey 3000 badges.  I cannot wait to post that photo.  John has the front cowl ready to buff and the hood is well underway.

The archive listing of this blog contains detailed step-by-step photos and narratives regarding this restoration since it began late last December.  Please direct any comments and questions to tommystoplesscars@yahoo.com.

Stay tuned,
Tom McCurry

Materials and equipment purchased from:
Moss Motors (mossmotors.com)
Victoria British (victoriabritish.com)
Eastwood (eastwood.com)
The Roadster Factory (the-roadster-factory.com)
English Parts (englishparts.com)
Napa Auto Parts (napaonline.com)


Thursday, September 20, 2012

FITTING THE HANDBRAKE

Tim had the handbrake handle re chromed.  The handle was rusted, but otherwise in good condition.  The handbrake system, except for the handle, was installed when the differential and rear brakes were fitted.  Today, all we had to do was fit the reconditioned handle.  Sounds simple doesn't it.  
When the chrome shop plated the handle, the rod that connects the handle to the cable was also plated.  This rod fits through a bushing which is mounted to the propeller shaft tunnel.  The plating had to be removed from the rod so that it would fit inside the bushing.  The process took about an hour or so, but it worked out well.

The archive listing of this blog contains detailed step-by-step photos and narratives regarding this restoration since it began late last December.  Please direct any comments and questions to tommystoplesscars@yahoo.com.

Stay tuned,
Tom McCurry

Materials and equipment purchased from:
Moss Motors (mossmotors.com)
Victoria British (victoriabritish.com)
Eastwood (eastwood.com)
The Roadster Factory (the-roadster-factory.com)
English Parts (englishparts.com)
Napa Auto Parts (napaonline.com)

Wednesday, September 19, 2012

EXHAUST SYSTEM COMPLETED

The new polished stainless steel exhaust system had been installed previously during the initial start-up procedure.  After the start-up process was completed, the exhaust system was removed so that the paint bodywork on the rear shroud could be completed.  Today we completed the installation of the exhaust system.


Looks great, doesn't it.


The archive listing of this blog contains detailed step-by-step photos and narratives regarding this restoration since it began late last December.  Please direct any comments and questions to tommystoplesscars@yahoo.com.

I remain...
Tom McCurry

Materials and equipment purchased from:
Moss Motors (mossmotors.com)
Victoria British (victoriabritish.com)
Eastwood (eastwood.com)
The Roadster Factory (the-roadster-factory.com)
English Parts (englishparts.com)
Napa Auto Parts (napaonline.com)


Tuesday, September 18, 2012

ASSEMBLING THE REAR CLIP

Don had the day off and I spent the day installing the rear bumper assembly.  The bumper brackets were loosely fitted yesterday so the attachment of the bumper was simple.  After it was fastened to the brackets, they were adjusted so that the bumper was the proper distance from the body.  


I also installed the license plate lamp and plate mounting bracket.  The new lamp fit the original mounting bracket very well.  
This was an unusual location for the plate lamp.  It is actually mounted inside the bumper.  This same lamp was used on many different models of MGs and Austin Healeys.


I also prepared the battery for installation.  When you order a battery and it is delivered by common carrier, it is shipped dry.  I purchased the required acid from Napa Auto Parts (napaonline.com).  The charging process was simple...directions are on the box.  After the acid is poured into the battery, a slow charge must be applied.  The battery is now ready for installation.

The archive listing of this blog contains detailed step-by-step photos and narratives regarding this restoration since it began late last December.  Please direct any comments and questions to tommystoplesscars@yahoo.com.

Big Healeys are BAD...
Tom McCurry

Materials and equipment purchased from:
Moss Motors (mossmotors.com)
Victoria British (victoriabritish.com)
Eastwood (eastwood.com)
The Roadster Factory (the-roadster-factory.com)
English Parts (englishparts.com)

Napa Auto Parts (napaonline.com)

Monday, September 17, 2012

ASSEMBLING THE REAR CLIP

This Healey is being assembled from back to front...just because.  The rear shroud and both rear fenders have received the final coats of Colorado Red and have been blocked and buffed.  Today we assembled the rear clip.

The fuel filler tube has been fitted to the body.  Also the tail lights and reflectors have been installed and await final testing before the lenses and bezels are installed.  The bumper brackets were also fitted and if we had not encountered so much difficulty installing the fenders and stainless steel beads, the bumper and exhaust system would also be in place.  


John, my painter, is doing a terrific job.  The trunk lid and front shroud are ready for paint tomorrow.  We will be finishing the rear clip in the next two days with the completion of the trunk upholstery,  battery, exhaust system and rear bumper.

The archive listing of this blog contains detailed step-by-step photos and narratives regarding this restoration since it began late last December.  Please direct any comments and questions to tommystoplesscars@yahoo.com.

I love this car, and it loves me...alot
Tom McCurry

Materials and equipment purchased from:
Moss Motors (mossmotors.com)
Victoria British (victoriabritish.com)
Eastwood (eastwood.com)
The Roadster Factory (the-roadster-factory.com)
English Parts (englishparts.com)


Friday, September 14, 2012

PREPARING FOR ASSEMBLY

This car is going to be beautiful.  The paint is flawless...so far.  We have prepared the rear of the car for assembly.
The rear shroud, shown in the photo to the right, and both rear fenders have received the final coats of paint and today they were blocked and buffed.  They look spectacular.
Monday morning we will begin the assembly process.  The rear fenders and stainless beading will be fitted to the rear shroud first.  Then the tail lights, bumper and fuel filler tube will be installed.


The archive listing of this blog contains detailed step-by-step photos and narratives regarding this restoration since it began late last December.  Please direct any comments and questions to tommystoplesscars@yahoo.com.

Taking shape...
Tom McCurry


Materials and equipment purchased from:
Moss Motors (mossmotors.com)
Victoria British (victoriabritish.com)
Eastwood (eastwood.com)
The Roadster Factory (the-roadster-factory.com)
English Parts (englishparts.com)


Wednesday, September 12, 2012

ANOTHER BEFORE AND AFTER

The drivetrain on the Healey is a work of art.  A short time ago I posted before and after photos of the engine compartment.  While looking back through the restoration photos, I discovered the following views of the Healey's cockpit.
 No rust, no grease; just clean, fresh paint.  Soon it will be a complete car.


The archive listing of this blog contains detailed step-by-step photos and narratives regarding this restoration since it began late last December.  Please direct any comments and questions to tommystoplesscars@yahoo.com.

Cannot wait...
Tom McCurry


Materials and equipment purchased from:
Moss Motors (mossmotors.com)
Victoria British (victoriabritish.com)
Eastwood (eastwood.com)
The Roadster Factory (the-roadster-factory.com)
English Parts (englishparts.com)


Tuesday, September 11, 2012

COLORADO RED

I thought my Mini Cooper was red...but the paint on this Healey will burn your retina.  It is called Colorado Red; don't ask me how a British car manufacturer came up with that name.  Pictured to the right is the rear shroud.  I realize it may be difficult to distinguish the shroud in this photo because of all the masking, but I assure you, this paint job is slick.  


Both rear fenders were painted today also.  All the panels will be blocked again tomorrow and the final three coats applied.  At that point, reassembly of the body will begin.


The archive listing of this blog contains detailed step-by-step photos and narratives regarding this restoration since it began late last December.  Please direct any comments and questions to tommystoplesscars@yahoo.com.

I remain...on edge,
Tom McCurry

Materials and equipment purchased from:
Moss Motors (mossmotors.com)
Victoria British (victoriabritish.com)
Eastwood (eastwood.com)
The Roadster Factory (the-roadster-factory.com)
English Parts (englishparts.com)

Monday, September 10, 2012

ANOTHER BEFORE AND AFTER

I enjoy doing the "before and after" posts.  After you work with new parts for an extended period of time you tend to forget how the car looked when the restoration began.  


Just thought you would enjoy viewing photos of the engine bay "before and after".


The archive listing of this blog contains detailed step-by-step photos and narratives regarding this restoration since it began late last December.  Please direct any comments and questions to tommystoplesscars@yahoo.com.


Time well spent...
Tom McCurry


Thursday, September 6, 2012

WE CHOSE SILICONE BRAKE FLUID

Since the brake and clutch hydraulic systems are new from "head-to-toe", we chose to use dot 5 silicone brake fluid.  It is five times the cost of ordinary fluid, but it pays off in the long run.  


Silicone fluid does not absorb moisture so the wheel cylinders, calipers, slave cylinder and master cylinders are less likely to rust.  No rust means extended life.  


This should be a low maintenance system for years to come.

The archive listing of this blog contains detailed step-by-step photos and narratives regarding this restoration since it began late last December.  Please direct any comments and questions to tommystoplesscars@yahoo.com.


Y'all come back now...
Tom McCurry


Wednesday, September 5, 2012

BLEEDING IN THE HYDRAULIC SYSTEM

While John was painting body panels, Don and I dismantled the front of the car and began work on the hydraulics.  The hydraulic systems on the Healey operate the brakes and clutch.  Each system has a separate master cylinder but shares a reservoir.  
The photo to the right shows the black reservoir with the correct label.


We began by making sure all hydraulic connections were tight.  Then we bled the clutch system mostly because it was the easiest...just one line.  Next, we tackled the brake system beginning with the left rear wheel because it is farthermost from the master cylinder.  After all the air is removed from that line, the remaining wheel cylinder with the longest line is bled.  This procedure continues until all wheel cylinders and calipers are bled.  At this point the clutch and brake systems are fully operational.

Stay tuned,
Tom McCurry


Monday, September 3, 2012

FINISH PAINT

As the body work progresses, we began the finish paint process on the body panels.  We are painting the car from back to front...and from inside to outside.  Today we painted the inside of the trunk lid and the inside of the rear fenders.
These panels look better than new.


Today, we also masked the rear shroud in preparation of final blocking and finish painting.  


The archive listing of this blog contains detailed step-by-step photos and narratives regarding this restoration since it began late last December.  Please direct any comments and questions to tommystoplesscars@yahoo.com.


Looking forward to tomorrow...
Tom McCurry